
Gluten-Free Graduation Cap Brownies

Gluten-free graduation cap brownies with chocolate square caps and piped tassels

A mini brownie, a square of chocolate for the mortarboard, and a piped tassel. They take about an hour and they are the easiest celebration dessert on this site.

You bake the brownies in a mini muffin pan rather than cutting squares, which gives you a flat top to build on and a shape that holds the cap.

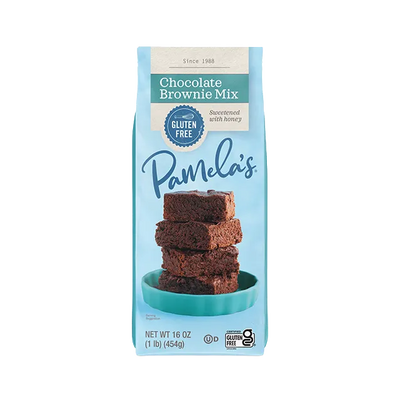
Made with Pamela's Chocolate Brownie Mix, using whichever brownie recipe you like best.

So good, no one will guess they are gluten-free, the way Pamela's has done it since 1988.

Filling the Mini Muffin Pan

Fill each cup enough that the batter is level with the top of the pan when baked, not domed.

That matters because a domed brownie will not hold a flat chocolate square. If yours dome anyway, slice the tops off level once they are cool.

Grease the pan well or use liners. Brownie batter sticks harder than cake batter does.

Bake and cool completely before decorating. A warm brownie melts the chocolate square on contact.

The mix these are built on Pamela's Gluten-Free Chocolate Brownie Mix Just add oil, egg, and water. GFCO-certified.

Building the Cap

A dab of frosting is the glue. Put a small amount in the center of each brownie and press a chocolate square onto it.

Let that set completely before you pipe the tassel. Piping onto a cap that is still sliding around makes a mess of both.

Pipe the tassel from the center of the square out toward one corner, then add a small dot or a candy at the center where the strings would gather.

School colors are the obvious move if you can find frosting or candies that match.

Made with

Gluten-Free Chocolate Brownie Mix, 16 oz. (opens in a new tab)
$11.49 Rated 4.7 out of 5 from 50 reviews.

Free shipping on orders $39+

Pack Size

Prep Time 40 minutes
Cook Time 14 minutes
Total Time 1 hour
Yield 24
Serving Size 1 brownie

Ingredients

  • 1 bag (16 oz) Pamela's Gluten-Free Chocolate Brownie Mix, plus the oil, egg, and water your chosen brownie recipe calls for
  • 24 chocolate squares, for the caps
  • Colored frosting or decorating gel, for the tassels
  • Colored mini candies, for the tassel centers

Used in this recipe

Gluten-Free Chocolate Brownie Mix, 16 oz. (opens in a new tab)
$11.49 Rated 4.7 out of 5 from 50 reviews.
Pack Size

Directions

  1. Prepare the Chocolate Brownie Mix using any of our brownie recipes. The classic version uses the mix, 1/2 cup oil, 1 egg, and 1/4 cup water.
  2. Heat the oven to 350 degrees F and grease a mini muffin pan well, or use liners.
  3. Fill each cup enough that the baked brownie will be level with the top of the pan rather than domed. Bake 12 to 14 minutes.
  4. Cool completely in the pan, then remove. If any have domed, slice the tops level with a knife.
  5. Put a small dab of frosting in the center of each brownie and press a chocolate square on top to form the cap. Let it set completely.
  6. Pipe a tassel from the center of each square out toward one corner using frosting or decorating gel.
  7. Add a small candy at the center of the square where the tassel gathers. Let everything dry before stacking or moving them.

Recipe Tips & Notes

Make-Ahead

Bake the brownies up to 2 days ahead and keep them covered at room temperature, undecorated.

Decorate the day of, or the day before at most. Frosting and gel soften over time and the caps start to slide.

Once decorated, keep them in a single layer. Stacking them undoes an hour of work.

The brownies freeze undecorated for up to 3 months. Thaw at room temperature and decorate once completely dry.

Ways to Change It Up

School colors for the frosting and candies, which is the obvious move and the one people remember.

A graduation year piped onto each cap instead of a tassel, if you have a steady hand.

Full-size brownies cut into squares instead of mini muffins, with a larger chocolate square on each.

White chocolate squares for the caps against dark brownies, which shows the tassel better.

A dusting of edible glitter over the finished caps.

What These Contain

This recipe contains milk and egg.

The chocolate squares and frosting contain dairy. The egg comes from the brownie recipe you choose; our egg-free brownie recipe works here if you need to avoid it.

Check your chocolate squares, frosting, and candies. Formulations vary by brand and the packaging will tell you.

Everything from Pamela's is certified by the Gluten-Free Certification Organization and made in a certified gluten-free, peanut-free facility.

Recipe FAQs

Bake brownies in a mini muffin pan so the tops are flat, cool them completely, then glue a square of chocolate on each with a dab of frosting. Once that sets, pipe a tassel from the center of the square toward one corner and add a candy at the center.

It gives you a flat top to build on and a shape that holds the cap. Cut squares from a pan work too, but the muffin shape is sturdier and more uniform, which matters when you are making two dozen.

A dab of frosting under the center acts as glue, and it has to set completely before you pipe the tassel. Piping onto a cap that is still moving makes a mess of both the cap and the tassel.

Bake up to 2 days ahead and keep them covered, undecorated. Decorate the day of or the day before at most, since frosting softens and the caps begin to slide. Keep them in a single layer once decorated.

Yes. Use our egg-free brownie recipe as the base, which uses applesauce, egg replacer, or blended tofu instead. The decoration is unchanged, though you should check your chocolate squares and frosting separately.

Reviews

Have you made this recipe? We would love to hear how it turned out, and any swaps you tried.

No reviews yet. Have you made this recipe? Be the first to tell us how it went.

Write a review

Your rating

Never shown publicly.

Reviews appear after a quick check by our team.

Have a question about ingredients or allergens? Our care team is happy to help.

Top Pamela's Searches