

Gluten-Free Halloween Mummy Brownies

Gluten-free Halloween mummy brownies with white chocolate drizzle and candy eyes

Most Halloween baking is fiddly. This is not.

One pan of brownies from Pamela's Chocolate Brownie Mix, cut into nine squares, drizzled with white chocolate, and given a pair of candy eyes. That is the whole decoration.

It takes about ten minutes once the brownies have cooled, and it is the kind of thing a seven-year-old can do properly. The uneven drizzle is what makes them look like bandages, so there is nothing to get wrong.

Mummy decoration adapted from Bex at Gluten Free Cuppa Tea.

So good, no one will guess they are gluten-free, the way Pamela's has done it since 1988.

How to Make Mummy Brownies

Four steps, and the first one is the only place you can go wrong.

Melt the white chocolate gently. Short bursts in the microwave with a stir between each, or a bowl over a pan of simmering water. White chocolate seizes faster than dark does, and once it has gone grainy there is no bringing it back.

Drizzle it back and forth across each brownie in uneven horizontal lines, leaving a gap near the top. Uneven is the point. Bandages are not tidy, and neat parallel stripes read as a barcode rather than a mummy.

Press two candy eyes into the gap while the chocolate is still soft. If it has already set, stick them down with a dab of melted chocolate on the back of each.

Let everything set at least an hour before serving or moving them.

Cut First, Then Decorate

This is the mistake that ruins a whole pan.

Cool the brownies completely before cutting. They firm up considerably as they cool, and a warm brownie drags under the knife and tears at the edges.

Cut into nine squares with a sharp knife, wiping the blade between cuts.

Then decorate each square separately. Drizzling the whole pan and cutting through it afterwards smears the chocolate across every cut and you lose the bandage lines entirely.

Let them cool fully before the chocolate goes on, not just before cutting. White chocolate drizzled onto a brownie that is still warm melts straight into the surface instead of sitting on top as bandages, and the lines disappear.

Bake 18 minutes and no longer. A toothpick should come out with a few moist crumbs rather than clean. Brownies baked until a toothpick comes out clean are dry brownies.

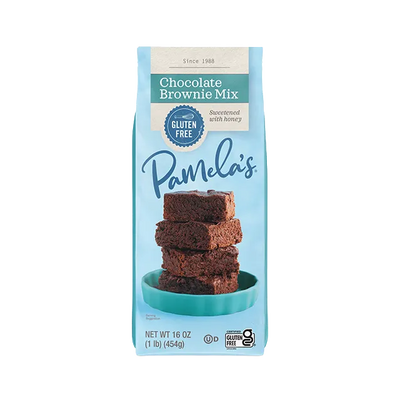
The mix these are built on Pamela's Gluten-Free Chocolate Brownie Mix Just add oil, egg, and water. GFCO-certified.

Choosing Candy Eyes

Look for candy eyes that are certified gluten-free, and check the white chocolate too.

Most candy eyes are sugar, cornstarch, and food coloring, none of which contain gluten on their own. But they are small novelty decorations made in a lot of different facilities, and the ingredient list alone does not tell you about cross-contact.

A certification on the package does. It is worth the thirty seconds in the aisle, particularly if you are baking for someone with celiac disease.

The same goes for the white chocolate. Certified gluten-free is the one to reach for.

If you cannot find certified candy eyes, pipe two dots of white chocolate and add a smaller dot of dark chocolate in the center of each once set. It takes longer and it works.

Made with

Gluten-Free Chocolate Brownie Mix, 16 oz. (opens in a new tab)
$11.49 Rated 4.7 out of 5 from 50 reviews.

Free shipping on orders $39+

Pack Size

Prep Time 20 minutes
Cook Time 18 minutes
Total Time 38 minutes
Yield 9
Serving Size 1 brownie

Ingredients

  • 1 bag (16 oz) Pamela's Gluten-Free Chocolate Brownie Mix
  • 1/2 cup oil
  • 1 large egg
  • 1/4 cup water
  • 1 cup white chocolate chips (optional, folded into the batter)
  • 1/3 cup white chocolate, certified gluten-free, melted, for the drizzle
  • 18 edible candy eyes, certified gluten-free

Used in this recipe

Gluten-Free Chocolate Brownie Mix, 16 oz. (opens in a new tab)
$11.49 Rated 4.7 out of 5 from 50 reviews.
Pack Size

Directions

  1. Heat the oven to 350 degrees F and lightly grease a 9-inch square baking dish.
  2. Combine the Chocolate Brownie Mix, oil, egg, and water in a large bowl. Stir with a fork until combined. Fold in the white chocolate chips now if using.
  3. Pour the batter into the pan and smooth it evenly to the edges.
  4. Bake 18 minutes, until a toothpick inserted in the center comes out with a few moist crumbs. Do not bake until it comes out clean.
  5. Cool the brownies completely in the pan. They must be fully cool before the chocolate goes on, or the drizzle melts into the surface instead of sitting on top.
  6. Cut into 9 even squares with a sharp knife, wiping the blade between cuts.
  7. Melt the white chocolate gently, in short bursts in the microwave with a stir between each, or over a pan of simmering water. Do not let it get hot.
  8. Drizzle the white chocolate back and forth across each brownie in uneven horizontal lines, leaving a gap near the top for the eyes.
  9. Press two candy eyes into the gap while the chocolate is still soft, or stick them down with a dab of melted chocolate on the back of each.
  10. Let the chocolate set at least an hour before serving or moving them.

Recipe Tips & Notes

Other Halloween Decorating Ideas

Spiderwebs. Pipe white chocolate in concentric circles over a brownie, then drag a toothpick from the center outward at intervals to pull it into a web.

Monster eyes. Scatter candy eyes across the plain brownie with no drizzle at all. It takes thirty seconds and it still reads as Halloween.

Spiders. A round chocolate candy for the body with piped frosting legs.

Ghosts. A thick blob of white chocolate with two eyes pressed in, rather than horizontal lines.

Orange and black sprinkles, which need no skill whatsoever.

Whatever you choose, decorate after cutting.

Make-Ahead and Storing

Bake up to 2 days ahead, cool, and keep covered at room temperature undecorated.

Decorated: up to 3 days in an airtight container. The white chocolate holds its shape well, which makes these a better make-ahead than a frosted brownie.

Refrigerator: up to 5 days. The drizzle firms up cold, so let them sit out 15 minutes before serving.

Freezer: up to 3 months, undecorated. Cut into squares first and wrap individually. Thaw at room temperature for about 3 hours, then decorate.

Do not freeze them decorated. Candy eyes bleed their color on thawing.

Ways to Change It Up

Fold a cup of white chocolate chips into the batter, which is how the original was written and makes a less intensely chocolatey brownie against the white drizzle.

Double it in a 9x13 pan for 18 brownies. Add about 5 minutes to the bake.

Mini brownies in a muffin tin, which gives you more to decorate. Bake 12 to 14 minutes.

A pinch of flaky salt over the drizzle before it sets.

Milk chocolate drizzle instead of white, for mummies that read more like bandages than ghosts.

Add a half teaspoon of espresso powder to the batter, which deepens the chocolate without tasting of coffee.

What These Contain

This recipe contains milk and egg.

The egg is structural. The white chocolate contains dairy, and there is no good dairy-free white chocolate substitute that melts and drizzles the same way.

Choose candy eyes and white chocolate that are certified gluten-free. The ingredients in candy eyes are usually fine on their own, but they are small novelty decorations made in many different facilities, and a certification is what tells you about cross-contact.

Everything from Pamela's is certified by the Gluten-Free Certification Organization and made in a certified gluten-free, peanut-free facility.

Recipe FAQs

Let the brownies cool completely, then drizzle melted white chocolate back and forth across each square in uneven horizontal lines, leaving a gap near the top. Press two candy eyes into the gap while the chocolate is still soft. Uneven lines look more like bandages than neat ones do.

No. Cut first, then decorate each square separately. Drizzling the whole pan and cutting through it smears the chocolate across every cut and you lose the bandage lines. Cool the brownies completely before cutting as well.

Look for ones that are certified gluten-free. The ingredients are usually sugar, cornstarch, and food coloring, none of which contain gluten on their own, but candy eyes are small novelty decorations made in many different facilities. A certification on the package is what tells you about cross-contact.

It got too hot. White chocolate seizes faster than dark does and cannot be brought back once it has. Melt it in short bursts in the microwave with a stir between each, or over a pan of simmering water, and take it off while there are still a few unmelted pieces.

Bake up to 2 days ahead and keep them covered at room temperature undecorated. Decorated, they keep 3 days, and the white chocolate holds its shape better than frosting would. Do not freeze them decorated, since candy eyes bleed their color on thawing.

Reviews

Have you made this recipe? We would love to hear how it turned out, and any swaps you tried.

No reviews yet. Have you made this recipe? Be the first to tell us how it went.

Write a review

Your rating

Never shown publicly.

Reviews appear after a quick check by our team.

Have a question about ingredients or allergens? Our care team is happy to help.

Top Pamela's Searches