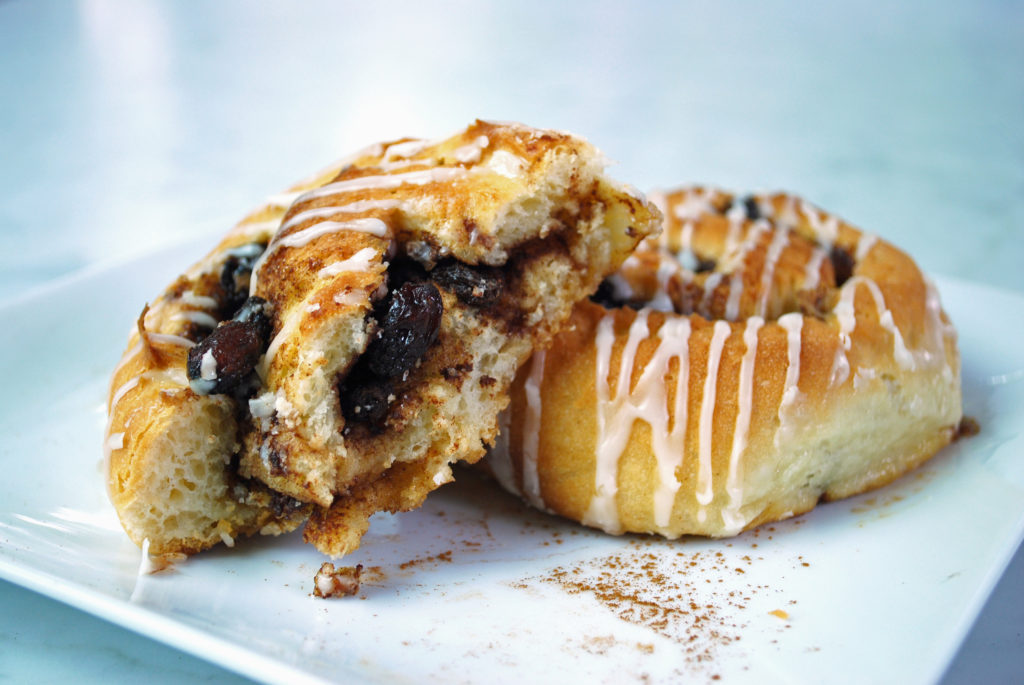
This is the ultimate morning splurge, with a creamy, nutty topping. Made with Pamela’s All-Purpose Flour Artisan Blend.
(For a Cinnamon Roll recipe using Pamela’s Bread Mix, click here.)

- 3¼ cups (460 grams) Pamela's All-Purpose Flour Artisan Blend
- 2 tsp salt
- 1 cup milk
- ½ cup sugar
- 6 TBSP butter
- 2 eggs, large To proof yeast
- ⅔ cup warm water (100° optimum)
- 2¼ tsp active dry yeast (7g) Filling
- 6 TBSP butter, softened
- ½ cup brown sugar
- 1 TBSP + 1 tsp cinnamon
- ½ to ¾ cup pecans, chopped (optional)
- ½ to ¾ cup raisins (optional) Vanilla Icing (for 12 drizzled rolls, or double this recipe for 12 frosted rolls)
- 1 cup powdered sugar
- 1½ to 2 TBSP milk or water
- ½ tsp vanilla EQUIPMENT
- 11x16-inch pan or two 8.5 x 11-inch pans or two 9.5 x 13-inch pans
Yield: 12 cinnamon rolls
FILLING
Mix butter, sugar, and cinnamon with a fork or mixer until well combined. Set aside. Plump raisins (if using) in hot water if they are dry, drain well, and set aside.
DOUGH
Heat milk on stove or microwave until bubbles form around edge, add sugar and butter, mix well and let cool. Proof yeast in warm water about 5 minutes until foamy.
In the bowl of a stand mixer whisk together the All-Purpose Flour Artisan Blend and salt. Add all liquids and eggs to dry ingredients and mix on low until combined. Mix on medium/high speed for three minutes (dough will stiffen and be easier to roll).
Lay down a couple large sheets of parchment paper to act as a base for assembling the dough. Generously spray two pieces of 12 x 16" parchment paper with cooking spray. Place dough in the center of one. Spread dough towards edges using a sprayed bench scraper or rubber spatula. Cover with the second sprayed piece of parchment, pat and push dough to fill the whole 12 x 16 area. (If dough rolls out beyond the edges, cut off with a knife and work back into an area that needs dough.) Carefully remove top parchment. Spread filling with small flexible spatula or fingers over the dough leaving 1" uncovered edge at the top on the long side. Spread pecans and raisins evenly over dough.
Using the parchment paper to help, roll log from the long side towards the uncovered edge, sealing log with your fingers or sprayed silicone spatula. Fold the log ends back into themselves to make a closed end. If needed, dough can be refrigerated for 15 minutes to firm up log before slicing.
Spray or grease pan well. Cut log into 12 slices with sprayed bench scraper or knife. Carefully place slices into the pan, leaving space in between and reshaping round if necessary. Cover pan with plastic wrap or sprayed parchment, place in a warm, draft-free spot and let rise to double in size 60 to 90 minutes.
Preheat oven to 350°. Remove covering, brush melted 1 TBSP butter on roll tops and bake in top third of oven for 25 to 30 minutes, or until golden brown across tops. Remove from oven to cool on rack, at least 15 minutes before serving with sauce or drizzling or spooning icing.
ICING: Whisk powdered sugar with milk, and vanilla to make a thick glaze. Add up to ½ TBSP more milk if necessary. Drizzle Icing from pastry bag in diagonal pattern or spoon on thickly over rolls, set on wire rack, set over parchment.
CHEFS NOTE: These are best when baked fresh and eaten warm. For a different flavor try using other dried fruit like currants or wild dried blueberries.
TO MAKE IN ADVANCE:
Raisin Cinnamon Rolls can be made up to 2 days in advance. Once dough is in pans, cover tightly and place in refrigerator for up to two days. When ready to bake, remove from refrigerator, allow to come to room temperature and double in size, remove wrap, and bake as per directions. Raisin Cinnamon Rolls can also be frozen after placing dough in pan and covering tightly. When ready to bake, thaw, let rise until doubled in size, remove wrap and bake as per directions.
© Pamela's Products, Inc.


